• Disclaimer

    Disclaimer: wireless-extender-setups provides assistance for various issues related to Range extenders and wifi devices on this website. We have no direct or indirect alliance with any third-party organization. Any image, brand name, products, trademarks and logo used is for referential purpose only.

  • Netgear Wifi Extender Reset

    How to Reset Netgear Wifi Extender

    Netgear wifi extenders transmit wireless signals from the router or access point to the endpoint. These devices are designed to strengthen the signal from the router. It also allows it to travel further, and extend the range of the WiFi network. It is completed by using a set of antennas to receive and then rebroadcast the signal from the router, which helps to strengthen the signal and make it more reliable. This allows people to access the internet from farther away and in places that are not in the range of the router. Most of the time, it works perfectly, but sometimes it needs a Netgear wifi extender reset. In this article, we can discuss the reasons and solutions for reset Netgear wifi extender.  


    Reason for Netgear Wifi Extender Reset 

    There are various reasons for the Netgear wifi extender reset. One of the main reasons for needing a reset is if the extender is not connecting to the WiFi network or if the internet connection is not stable. It occurs because of an outdated firmware version or if the wifi settings are changed. Reset Netgear wifi extender can fix any connection issues you are facing. 

    It can also help if you are having trouble setting up the extender or if it isn’t working as expected. Resetting the extender also restores the default settings and helps you get the most out of your device. Here you can check out the various reasons for the Netgear wifi extender reset. 


    Troubleshooting 

    The factory default settings on your wifi extender can help you resolve issues such as poor performance, connectivity issues, or a device not working as expected. When you reset your device, the factory default settings are restored. It helps you to fix the various issues.


    Forgotten Login Credentials

    You can’t access the settings of your WiFi extender if you forget the login credentials. By resetting the device, you can reset your password and erase the login credentials. Resetting the device restores the default settings. This causes any forgotten passwords to be erased, allowing you to create a new password and access the settings. 


    Selling Or Giving Away The Device 

    It is a good idea to reset your wifi extender if you are selling or giving it away. You can access your personal information and settings. By resetting the extender, you can clear all your data and settings, such as your Wi-Fi password, so that the new owner cannot access them. This prevents the new owner from accessing your data or making changes to your settings. 


    Updating Firmware 

    You can update the firmware of the extender with a factory reset if you’re having trouble updating it. When there is a problem with the extender’s compatibility, a factory reset is helpful. A factory reset also removes the settings stored on the extender and allows you to reinstall the firmware with the latest version. This will ensure the extender is up-to-date and compatible with the router it is connecting to. Now you can quickly solve the issue and reset Netgear wifi extender. 


    Necessary Steps Before Netgear Wifi Extender Reset 

    It is common for Netgear Extender users to try to reset their devices smoothly, but not all of them are successful at it. For a successful Netgear WiFi extender reset, there are some precautions that one can take.  

    • Ensure that the extender is connected to a reliable power source.
    • When connecting your extender, do not use the extension cable.
    • When attaching your extender, do not use worn cables.


    A damaged or weak point can interrupt the connection. When the connection is interrupted between the reset process and the reset, the process is interrupted. The next option isn’t suitable for many users since it damages your router’s firmware or memory. 


    Switch On   Netgear Wifi Extender

    It is important not to interrupt the process of booting up the wifi extender once it is restarting. Interrupting the process can cause instability in the extender’s connection, resulting in poor performance and a decrease in the range of your wireless network. Netgear extender changes entail many changes, such as SSID Name, Password, and Settings, and it is important to note down all the changes. When you are finished resetting your extender, you need these credentials. Now you can easily reset Netgear wifi extender. 


    Methods For Netgear Wifi Extender Reset 

    You can use two methods for the Netgear wifi extender reset. 

    • Using Web
    • Manual Reset Button

    Both methods are simple, and you can complete the reset Netgear wifi extender quickly. 


    Manual Way to Reset Netgear Wifi Extender 

    Most users resetting their extenders during the off-state make a mistake, and we hope you won’t do the same. You can make sure that the extender you plan to reset is on before you begin. If you reset the device while it is off, you can’t access the settings, which need to be reset properly. It is important to make sure that the device is on so that you can go through the reset process correctly. 


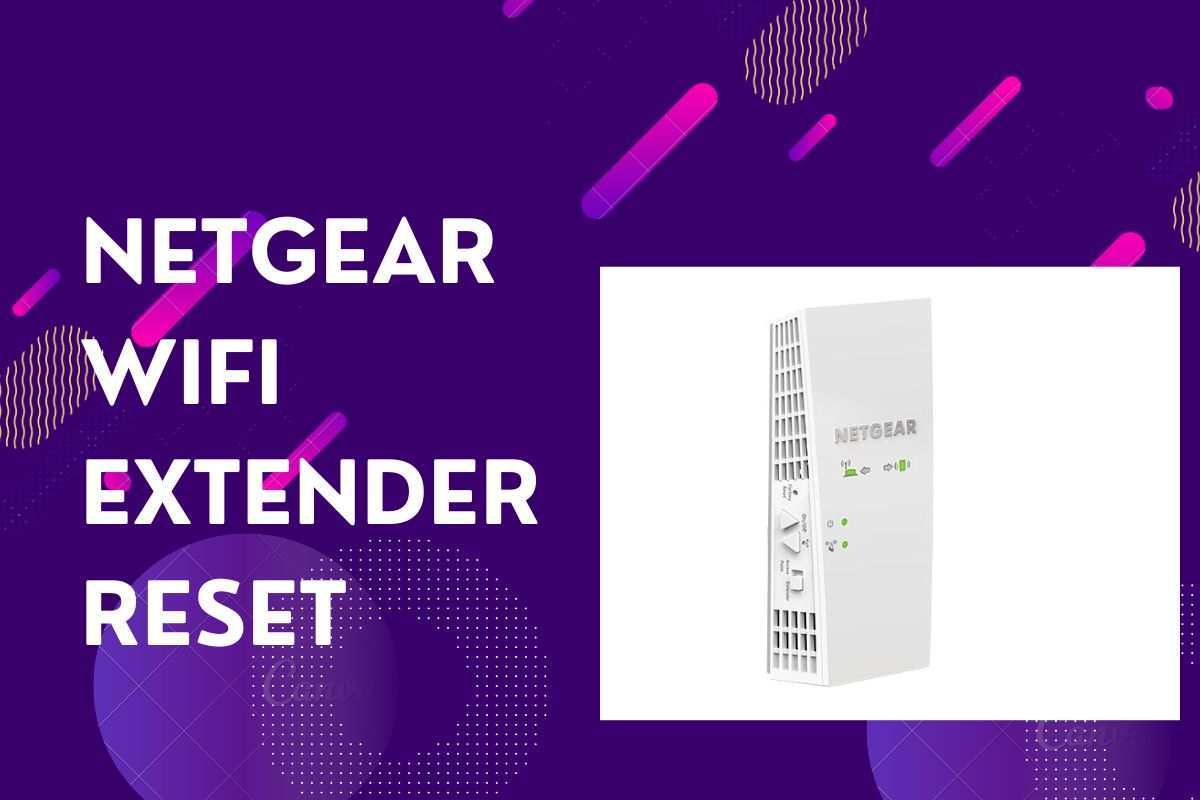
    Search Factory Reset Button

    It is designed in such a way that the Factory Reset button is never accidentally clicked. When you are in a dark room or dark space, try using a flashlight to find the button on the back of the router. The button is usually recessed, making it harder to press accidentally. Additionally, it’s often located in an area on the back of the router that is hard to reach, further preventing accidental activation.


    Press Factory Reset Button On Your Extender 

    • Using a paper clip or a pointed object such as a pen, place it inside the hole.
    • Avoid applying too much pressure. You can break the button if you put too much pressure on it.
    • It takes a few seconds for the computer to boot up after pressing the reset button. 


     Release The Reset Button 

    • Upon seeing the extender light on, release the reset button.
    • Pressing the reset button for too long can damage your extender, and there’s a chance it freezes the whole process. 

    The extender light lets you know that your extender is reset itself and is ready to reconfigure. If the reset button is held for too long, it causes the extender to malfunction and become unresponsive. 


    Wait For the Complete Process of the Netgear WiFI Extender Reset 

    • A factory reset restarts the extender once it is completed.
    • To complete this process, make sure that the extender is connected to a reliable power source and is switched on at all times. 
    • Be sure that none of the lights on the extender are flickering before you turn off the power. 

    The process may take a few minutes to complete. Your Netgear Wireless Range Extender is now set up by going to the official Website. There is also a need to follow all the steps accordingly. 


    Using Web Browser For Netgear Wifi Extender Reset 

    You will need the following items to reset your Netgear extender:

    • An internet-connected laptop or computer
    • There is a need for an Ethernet cable.
    • You also have a Netgear wifi extender.


    Attach Your Device With Extender 

    Ensure a reliable power source is connected to the extender. Use an Ethernet cable to connect your device to the extender. Upon successfully connecting the extender to the device, Open your web browser and navigate to wifiext.net. This allows the extender to be configured properly and recognize the device, which ensures that the connection is secure and the extender is working properly. 
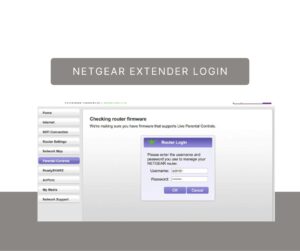
     

    Login to Website 

    • Upon turning on the extender,
    • Enter mywifiext.net or mywifiext. local as the URL for the website to set up your WiFi extender.
    • It is also possible to visit 192.168.1.250 if none of the above IP addresses work.
    • When you don’t change your Netgear extender credentials, a Netgear smart wizard appears.
    • You can enter your new login credentials if you change your default credentials previously. By default, Netgear extenders come with a preset username and password. When you change the default credentials, you are prompted to enter the new ones when the Netgear Smart Wizard appears.


    Go To Settings In Netgear Genie Wizard 

    To reset the extender, navigate to the Netgear Genie Wizard webpage and click the reset option. You usually find the reset button under the settings option, then click on another setting. The Netgear wifi extender reset restores the extender to its original factory settings and allows you to reconfigure it. This is necessary if you are having connectivity problems or want to change the extender’s settings. 


    Select Reset Option 

    • When you select the reset option, you can see a list of options. Click on Yes to verify it.
    • It restores the extender’s settings to their factory defaults once the process is complete.
    • The session on the website also ends, and you can log out.
    • A reboot of the extender occurs during the reset process.
    • You can’t turn off the extender until all the lights on it turn solid green.

    When the reset process is complete, you are ready to configure/set up your extender. You can accomplish this by following the extender setup guide. 


    Final Words 

    It is always important for users to reset Netgear wifi extenders if they are facing various issues. You can use the above methods for Netgear wifi extender reset. There is also a need to follow all the steps properly. Resetting the extender can help to fix any software glitches that may be causing the issues. It can also help to improve the performance of the extender by clearing out any corrupted data or settings that affect its performance. 


    Netgear Access Point Setup

    Netgear Access Point Setup

    Netgear Access Point is a device that enables a wireless connection between a router and other devices. It extends the range of a wireless network, allowing users to access the Internet from a greater distance. It also provides additional security features, allowing users to restrict access to a network. Now it is easy to install and configure and can be used to create a secure, reliable, and fast wireless connection.

    It is a cost-effective way to extend the range of a wireless network and is ideal for homes and businesses. Additionally, it can be used in areas where traditional wired networks are difficult or impossible to install, such as in multi-story buildings or rural areas. It is also scalable and can be used to expand a network as the number of users and devices increase. 

    It is also crucial to know about the Netgear access point setup. Connect the Ethernet cable from the router to the access point. Power on the access point and connect to it with a laptop or mobile device. Access the access point’s web-based setup page and configure the settings. Here we can discuss in detail of Netgear access point.


    Check the IP Subnet of the Existing LAN

    Your AP’s default IP address is on a sticker on the back or bottom. An AP with a default IP address in a different subnet from your LAN network will need to have its IP address changed. There is a need to check the IP subnet of the existing LAN. You can check out these steps.

    • An existing LAN can be used to connect a computer. Ensure that you have internet access.
    • Using the Windows command prompt, open a command window. It varies depending on the Windows version, but you click the Start button and type cmd into the Search programs and files box.
    • Using the command prompt, type ipconfig. Take note of your subnet mask and default gateway in the resulting output. 

    You can also check out these on Mac devices, so there is a need to read all the instructions in the manual properly. 


    Configure a Static IP Address on Your Computer


    It is also necessary for you to configure a static IP address on your computer. Let’s check the below points.

    • A temporary IP address in the same subnet as the AP default IP address will be required to configure the access point.
    • Change adaptor settings by going to Start > Control Panel > Network and Internet > Network and Sharing Center.
    • To connect to a local area network, double-click it.
    • After this, you can tap on properties.
    • Click here to highlight the Internet Protocol Version 4 (TCP/IPv4).
    • There is a need to set the IP address of your computer to 192.168.0.210 and the Subnet mask to 255.255.255.0.
    • By using an Ethernet cable, connect the computer directly to the AP.  
    • You will need to open an internet browser. Type the IP address of your AP (for example, 192.168.0.100) in the address bar of your browser.  

    After this AP login screen appears, you can log in using the default username and password. Here the username is admin and the password is password.


    Change the IP address of the Access Point

    AP configuration interfaces differ from model to model so it is necessary to change the IP address of the access point in the process of Netgear access point setup.

    • If you are using the latest models, tap on Configuration > IP.
    • If you are using the old models, then tap on IP settings.
    • A DHCP server (usually the router) can provide the IP address to the AP if you select DHCP Client Enable. 
    • Here you can tap on Apply. To ensure that the AP always gets the same IP address, you should also configure a DHCP Reservation on the DHCP server. The AP interface will be easily accessible once it has been connected to your network. 

    You can also set manually the static IP address of the AP by following the below steps.

    • Make sure to choose an IP address that is not in use and is not in a DHCP server’s range (scope). 
    • Your network’s IP address and Subnet Mask are set accordingly.
    • You can leave the default gateway address blank, or fill it in with the default gateway address for your network.
    • There is a need to select an IP address that is not currently in use and also outside of the range and scope of the DCHP server of the network.
    • Here it is necessary to set the IP address and subnet mask according to your network.
    • It is also vital to leave blank the default gateway address or you can also enter the default gateway address of your network. 
    • It is possible to leave the DNS server addresses blank or to fill them in with the DNS addresses for your network. Most of the time, the primary DNS corresponds to the default gateway, while the secondary DNS is blank. 


    After the Netgear access point setup there is a need to attach AP to the existing network. Your existing network is connected to the AP after disconnecting the Ethernet cable. 


    Final Words 

    When you complete the process of Netgear access point setup then you can use the AP is easy. It is also necessary to follow all the steps accordingly and complete the setup process of AP. 


    Netgear_ext is not showing up

    Solve Netgear_Ext Not Showing Up

    The Netgear Extender works well most of the time. Sometimes the issue of Netgear_Ext not showing up on the network list occurs. It also becomes vital to fix the issue quickly. This issue occurs because of multiple reasons such as poor wifi connection. Its primary reasons are : 

    • Sometimes users disable the network connection.
    • You can place your extender far from the router.
    • There is also the chance of partial installation of a Netgear extender.
    • There is also a chance that you are using the outdated firmware of the Netgear extender.

    These are the major reasons for the Netgear extender not working. It is also important for users to use the top methods to solve the issue quickly. 


    Ways To Solve Netgear_Ext Not Showing Up

    You can use different methods to solve the Netgear_Ext not showing up issue. There is a need to use the below methods to solve the problem quickly. 


    Use a Strong Internet Connection 

    One of the major reasons why your extender isn’t showing up on the network list is a slow or weak internet connection. You can therefore ensure that your Netgear WiFi range extender is well-connected to your router. Instead of connecting your devices wirelessly, use a cable if you’ve connected them wirelessly so far. By doing so, you will ensure the stability of the internet. It also helps in fixing errors quickly. 


    Update Your Netgear Firmware 

    It is also crucial to use the latest firmware of the Netgear extender. Your laptop’s or PC’s firmware can become corrupted if it contains a virus. Don’t jump to conclusions before scanning your device. Netgear_ext is not showing up on the network list due to outdated firmware. You will need to access mywifiext.net and follow all the on-screen instructions so you can update the firmware of your Netgear extender. After this, there is a need to check whether the issue of the Netgear extender not working is solved or not. 


    Place Your Netgear Extender Near the Router 

    The distance between your devices is another reason why the extender name isn’t showing on the network list. Make sure you place as close your range extender as possible to the router. Close enough, but not close enough. In any other case, their WiFi signals will clash, causing unwanted technical problems. It is always necessary for users to search for the best place for the extender and router. After placing the extender near the router, there is a need to check whether the issue of Netgear_ext not showing up is fixed or not.


    Enable Network Connection 

    When you disable the network connection, the issue of Netgear_ext not showing up occurs. There is a good chance that your WiFi network is disabled, which is causing all the fuss. There’s no need to worry. The solution to this problem is to open the network adapter settings, right-click on the SSID you want to use, and click on Enable. After this, you can check if the Netgear_ext not showing up is fixed or not.


    Install the Netgear Extender Perfectly

    Installing your Netgear extender properly can also help you troubleshoot the issue at hand. Your network name isn’t showing up on the list because you messed up during the setup process. There is a need to set up your extender properly, so the chance of error is less. You can also set up the Netgear extender again so you can quickly fix the issue of Netgear_ext not showing up. You can also use the best method to set up the Netgear extender. There is always a need to adopt the easy and quick method for the Netgear extender setup. 


    Troubleshooting Steps

    It is important to ensure that there are no loose connections. Finger-tightness is essential when it comes to power cables or Ethernet cables. You can also replace any damaged cables as soon as possible. If you use a web browser to access mywifiext, make sure it is updated.


    You can keep your Netgear extender away from cordless phones, televisions, aluminum studs, washing machines, baby monitors, and other electronic devices. This might interfere with the signals from your extender. When you follow these troubleshooting steps, problems with Netgear_ext not showing up are fixed quickly.


    Final Words 

    You can use the above methods to solve the Netgear_ext not showing up issue. There is also a need to follow all the on-screen steps perfectly so you can fix the problem quickly. It is also important for users to find the best place for their Netgear extender and never place other products that interfere with signals there. 


    Netgear AX1800 Setup

    Complete Guide On Netgear AX1800 Setup

    The Netgear AX1800 is a dual-band extender that comes with many modern features and is the most advanced in the industry. When you can complete the Netgear AX1800 setup, you can quickly add multiple devices with them. After using this, there is no chance of dead zones in your house or office. In this article, you can learn proper methods for setup new Netgear AX1800 extender. 


    You can use the three methods listed below for the setup New Extender under AX1800.

    • Using the Netgear Genie Setup Wizard.
    •  Netgear Nighthawk app.
    •  Pressing the WPS button.

    It also depends on the user’s preference regarding the type of method they want to use. Here we can discuss all the methods in detail.


    Netgear Extender Login


    Using Netgear Genie Wizard for Netgear AX1800 Setup 


    You can use the Netgear Genie wizard for the setup Netgear AX1800 extender. It is also crucial to follow all steps accordingly so you can quickly complete the process.

    • First, you can search for the power button on the Netgear AX1800 extender and press it.
    • Here it is vital to plug your device into a wall socket.
    • After a few seconds, the power LED light becomes solid green.
    • Now you can use the ethernet cable and attach the router with your extender.
    • You can open your favorite browser and enter mywifiext.net.
    • After this, you can press the Enter key.
    • You can see the login page on the screen.
    • It is important to enter the default username and password of your extender.
    • Here you can follow all the on-screen instructions for the Netgear AX1800 setup.

    After completing the setup process, you can quickly start using the Netgear AX1800 extender.

    Using Nighthawk App For Netgear AX1800 Setup 


    You can use the Nighthawk app for the setup Netgear AX1800 extender. It is easily available on both the Google Play Store and the Apple App Store, and you can quickly download it on your device.

    • First, you can download and install the Nighthawk App.
    • Now you can attach your router with your extender.
    • Here you can open the Nighthawk app and create a Netgear account.
    • After this, you can enter the default login credentials and tap on the login button.
    • It is necessary to follow all the on-screen instructions properly and complete the setup Netgear AX1800 extender. 

    When the process is complete, you can quickly start using and you can also connect multiple devices. 


    Using WPS Method For Netgear AX1800 Setup 


    You can also use the WPS method for the Netgear AX1800 setup because it is a simple method. You can quickly complete the process with these simple steps. It is also necessary to check that your router has a WPS button. You can follow the steps to complete the process.

    • Turn on your Nighthawk EAX20 WiFi range extender.
    • Watch the power LED light until it turns solid green.
    • The Netgear extender needs to be connected to the WiFi router.
    • The AX1800 extender has a WPS button at the bottom.
    • Press the button carefully once you locate it.
    • Here you can press and hold the button for a few seconds. 
    • After that, move your Netgear WiFi extender to a new location.
    • Connect your computer or laptop to the extended network now.

    When the process of setup Netgear AX1800 is complete, you can quickly start using it and update its firmware as well.


    Troubleshooting Steps for Netgear AX1800 Setup 

    Sometimes users face issues with the Netgear AX1800 setup, such as mywifiext.net not working or network connectivity issues, among many others. Many users don’t know how to fix the wifi extender that is not connecting to the network or can’t connect to mywifiext.local. Here we can tell you some steps that will help you reduce the chances of these types of errors. Let’s check: 


    • Ensure your Netgear Nighthawk AX1800 receives enough power from the wall outlet.
    • You can make ensure that the wall socket you are using for the extender is working. Sometimes it is loose or worn out.
    • It is also necessary for the Netgear AX1800 extender that you have a fast internet connection.
    • There is a need to avoid placing the multiple products that block signals near the Netgear AX1800 extender such as microwave ovens, refrigerators, corners, concrete walls, metal objects, fish tanks, washing machines, and many others.
    • It is also crucial to enter the accurate web address in the address bar.
    • There is also a need to use the updated version of the web browser during the extender setup.
    • It is also imperative to update the firmware of the extender regularly because it automatically multiple technical glitches and bug fixes.

    These are the primary steps to fix the setup and other issues.


    Wrap Up 

    It is necessary to use the best method for the Netgear AX800 Setup so you can quickly complete the process. All the methods are simple, so you can easily perform them.